Intro
Turning a flat 2D picture into a 3D model might sound like magic, but AI-powered tools have made the process surprisingly simple. In this guide, we'll walk you through the entire workflow, from choosing the right method and preparing your image to exporting a model you can actually use in games, 3D printing, or design visualization.
What Does It Mean to Convert a 2D Picture to 3D?
When you convert a 2D picture to 3D, you create a three-dimensional digital model with height, width, and depth from a flat image. AI algorithms analyze the image to infer the object's shape, texture, and even the parts you can't see, like the back or sides. Understanding the basics helps you choose the right approach and set realistic expectations for the final result.
Step-by-Step: How to Convert an Image to 3D
The core workflow for AI-based image-to-3D conversion is consistent across tools and easy to follow:
Step 1: Choose Your Method
First, decide between an AI-powered converter and manual 3D modeling software. If you want a 3D model in minutes without prior experience, an AI tool like the image-to-3D feature is your best bet. For complete control over every polygon, you might prefer manual modeling in software like Blender, but that requires hours or days of precise work and a steep learning curve.
Step 2: Prepare Your Image
The quality of your source image is the single most important factor in the final 3D output. Use a clean, well-lit photo with the subject centered and no background clutter. For best results, aim for a resolution of at least 512x512 pixels, and avoid blurry images or extreme angles. The next section provides a full checklist.
Step 3: Upload and Generate
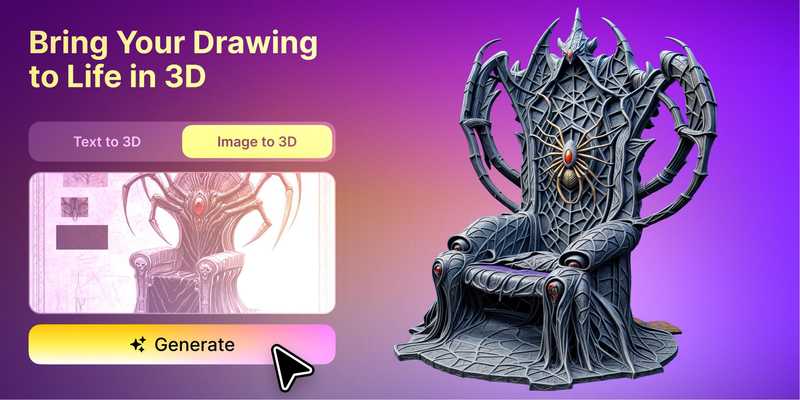
Upload your image to the AI tool of your choice. Most support common formats like JPG, PNG, or WebP. The AI will process the image and generate a textured 3D mesh, typically within a minute. Many tools, including Meshy, offer a multi-view mode where you can upload up to four angles (front, back, left, right) to significantly improve the accuracy of the unseen sides and reduce geometric guesswork. You can convert a 2D picture to 3D with Meshy with Meshy and then inspect the result in your target 3D tool before using it downstream.
Step 4: Review and Refine
After generation, rotate the model in the viewer to inspect the geometry from all angles. Check for distortions, missing parts, or texture issues. If something's off, refine the source image or use the tool's built-in post-processing options like remeshing or AI texturing to enhance the mesh and materials.
Step 5: Export for Your Workflow
Finally, export the model in a format that fits your destination. For 3D printing, use STL or 3MF. For game engines like Unity or Unreal, FBX or GLB is ideal. Web and AR applications often use GLB or USDZ. Meshy supports these and other formats (like OBJ and BLEND), making it easy to move your asset to the next stage.
How to Prepare Your 2D Image for the Best 3D Result
Source image quality is paramount. Follow this checklist to give the AI the best possible input:
- Use a clear background: A simple, uncluttered background or a transparent PNG helps the AI focus on the subject.
- Lighting: Ensure even, soft lighting without harsh shadows or glare. Natural light works well.
- Single subject: The image should feature one clearly defined object, fully visible and not partially hidden.
- Resolution: Use an image of at least 512x512 pixels for adequate detail.
- Avoid: Multiple objects, occlusion, blur, low resolution, or extreme perspective distortion.
- Multi-angle capture: For complex objects, consider providing multiple views (front, side, back) to help the AI infer the correct structure.
Basic editing like cropping and adjusting contrast can help, but avoid heavy filters that might confuse the AI's interpretation.
What Are the Limitations of Converting a Single Image?
A single 2D image inherently cannot show the back or sides of an object. AI models must 'imagine' these unseen parts, which can lead to inaccuracies. This is a known challenge in the field; research on single-view 3D reconstruction highlights the difficulties in capturing complex geometry and ensuring fidelity. You may encounter distorted geometry, unrealistic back-side structures, or 'hallucinated' details that don't match the original object.
How to mitigate these issues:
- Use multi-view input where available, as it provides crucial visual information from different angles.
- Choose subjects with a simple, predictable silhouette.
- Be prepared to do some manual cleanup or post-processing in external tools if the model needs to be highly accurate.
AI industry tools are improving at this every year, but it's important to have realistic expectations. No tool can guarantee a perfect reconstruction from a single image alone.
AI Tools vs. Manual Modeling: Which Should You Use?
Deciding between AI-based conversion and traditional manual 3D modeling is key. Here's a quick comparison to help you choose the right approach for your project:
| Factor | AI Tools (like Meshy) | Manual Modeling (e.g., Blender) |
| Time to model | Minutes | Hours to days per asset |
| Learning curve | Minimal – instant access | Steep – months to master |
| Control | Algorithmic interpretation | Precise vertex-level control |
| Best for | Rapid prototyping, game assets, 3D printing | Professional animation, specific topology |
| Complex geometry | Challenging | Handles well |
A hybrid approach often works best: use AI to generate a base model quickly, then refine it manually if you need precise topology or custom details. Using an AI tool like Meshy lets you get a project started without installing a full 3D suite.
Export Formats and Use Cases
Here are the most common 3D file formats and where they shine:
| Format | Ideal Use | Notes |
| GLB | Web, AR, general exchange | Can pack textures in one file; test in the target viewer. |
| FBX | Unity, Unreal, DCC tools, animation | Supports rigs and animation; verify imports. |
| OBJ | Broad compatibility | Static mesh; often comes with MTL and texture files. |
| STL | 3D printing | Geometry only, no textures; choose for prints. |
| 3MF | Color 3D printing | Supports color and metadata; your slicer may have limitations. |
| USDZ | Apple AR Quick Look | Designed for Apple AR workflows. |
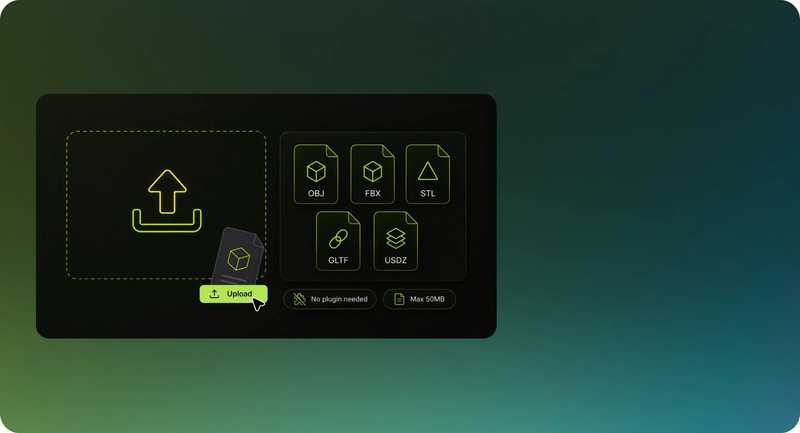
When choosing a format, consider your destination software and its requirements. Meshy, for example, supports many of these export options, so you can seamlessly hand off your asset.
Troubleshooting Common Conversion Issues
- Distorted geometry: The model looks warped or missing parts. Try improving the source image (better focus, cleaner background, simpler subject) or use multi-view input for more reference.
- Missing textures: The model has blank or gray areas. Ensure your source image has good color and lighting, or use AI texturing tools to regenerate materials.
- Generation failed: Check that your image is a standard format (e.g., JPG, PNG) and meets file size limits. Try a different image or modify it before re-uploading.
- Export errors: Confirm the file format is compatible with your destination software. Some formats like STL don't support textures, so you might need to export a different format for textured workflows.
- Long processing times: This could be due to high image resolution or temporary server load. If the wait is excessive, try lowering the image resolution or starting over.
If you continue to face issues, many tools provide support documentation or community forums for deeper troubleshooting.
Conclusion
Converting a 2D picture to a 3D model is now a practical skill for any creative professional. By understanding the process, preparing your images well, and managing expectations around limitations, you can produce useful assets for a variety of applications. Start with an AI tool to get quick results, and consider a hybrid workflow to refine your models. Experiment, iterate, and you'll soon be generating your first 3D model from a simple photo.
Frequently Asked Questions
Can any 2D picture be converted into a 3D model?
Many clear object images can be converted, but heavily cropped, blurry, reflective, transparent, or occluded subjects are more difficult.
Does one image provide accurate depth?
One image does not contain complete depth information, so AI estimates hidden geometry. Inspect the rear and underside before production use.
How can I improve the result?
Use a high-resolution image with even lighting, a simple background, and a clear silhouette, then refine geometry and textures after generation.
Can I use the model for games or 3D printing?
Yes, after checking topology, scale, wall thickness where relevant, and the export requirements of the destination tool.